The form says maximum file size 2 MB. Your photo, straight off a phone bought any time in the last five years, is five. So you go looking for a way to reduce image file size that doesn’t hand back a blocky mess where a face used to be, and every result promises you can do it “without losing quality”, which is a promise all of us bend a little.
I built ToolsTray’s image compressor. Here is how I use it, and where it stops being able to help.
The short version
- Drop your photo onto the Images box. On a phone, the Take photo button in the dropzone skips the camera roll entirely.
- Leave Smart compress alone. It’s already selected when the page loads.
- Press Compress.
- Drag the before-and-after slider, look hard at a face or a patch of sky, then Download.
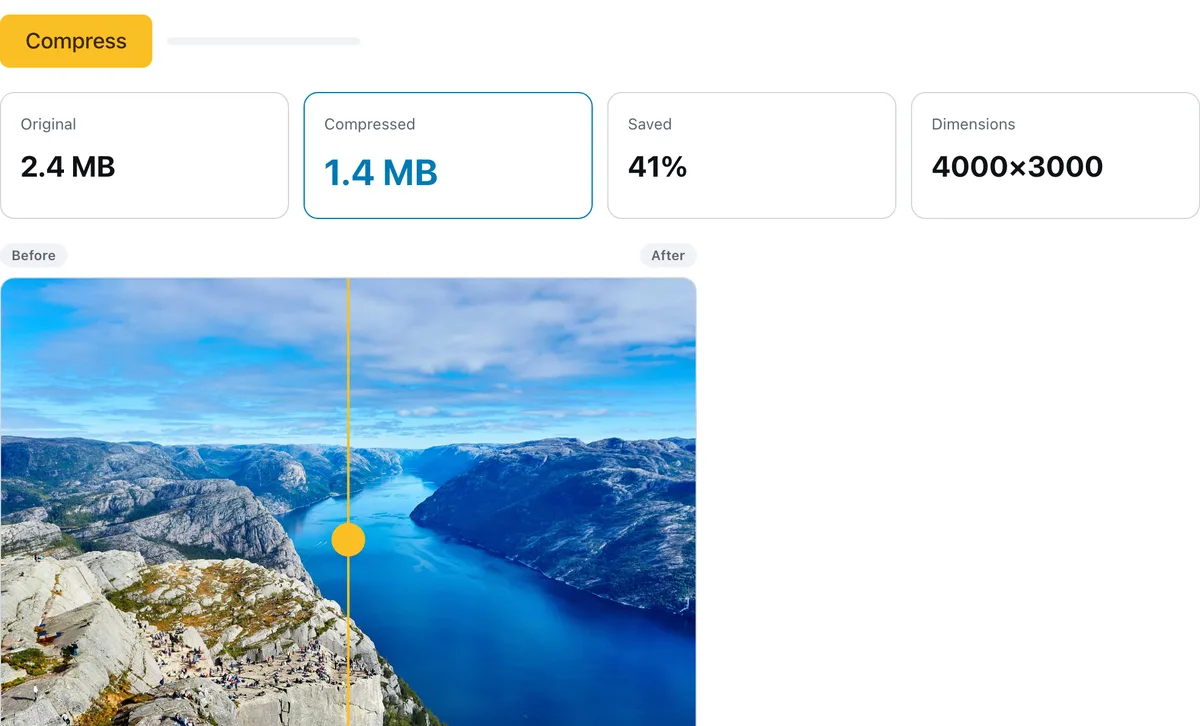
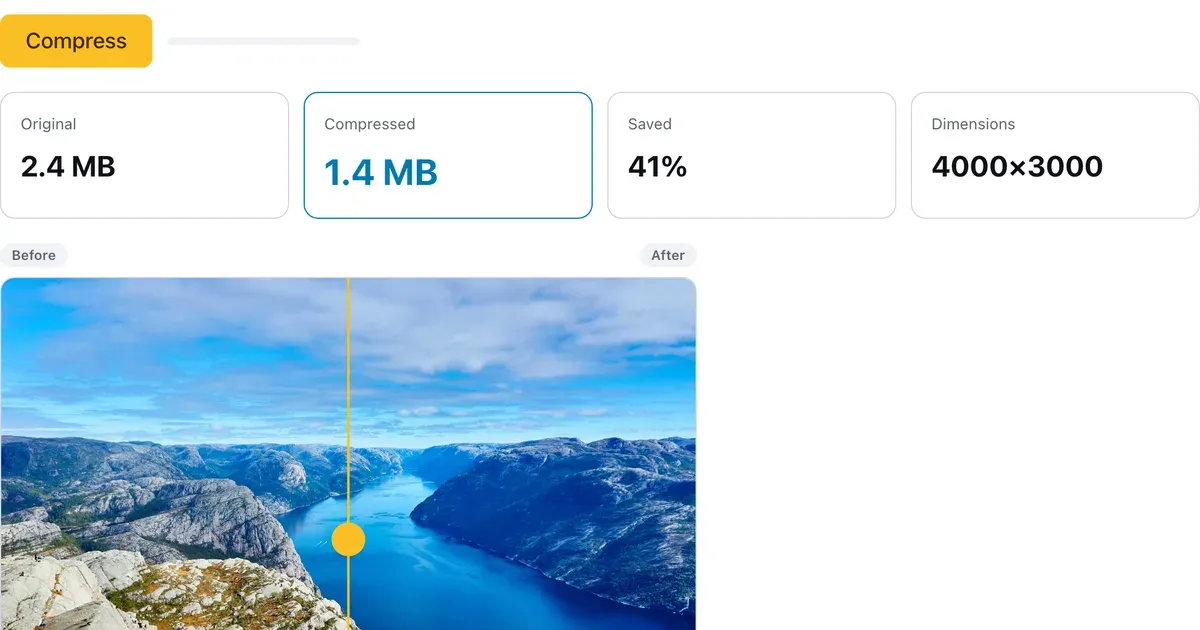
2.4 MB in, 1.4 MB out. 41% smaller, and I couldn’t pick the two apart in the slider.
Those figures are from a real run: a 2.4 MB photo at 4,000 × 3,000, through Smart compress, out at 1.4 MB and 41% smaller, with the dimensions untouched at 4,000 × 3,000. Compressed is the card the upload form cares about.
What “without losing quality” honestly means
WebP, AVIF and JPEG all work by discarding detail. That’s the deal you sign when you pick one. It holds up because a camera records far more information than your eye ever collects off a screen, so there’s a quality setting where the file loses a third of its weight and you cannot see what left.
Smart compress goes looking for that setting instead of guessing. It encodes at quality 80 first, and if the result is smaller than what you gave it, that’s your file. Otherwise it steps down through 72, 65, 58, 50, and finally 42. Some photos survive all six rungs and still come out fatter, usually JPEGs that something already squeezed once. When that happens you keep the file you started with and the tool says why it refused to swap it.
Which mode to use
Smart compress for almost everything. Target size (KB) when a form gives you a hard number: type 500, press Compress, and it searches the quality range for the highest setting that lands under your ceiling. If your file is already under the number you typed it stops before running a single encode and says so. If it can’t reach your number at all, you still get a file, plus a note naming the smallest size it managed.
Manual quality reveals a slider parked at 75. Worth being clear about this one, because I’ve watched people sit there waiting: dragging it only changes the number printed beside the label. No size figure moves until you press Compress.
Output format offers four choices and PNG isn’t one of them. WebP is the default and the best balance. AVIF goes smaller still and is slow enough that the status line warns you first. JPEG is for the systems that accept nothing else. The fourth is Keep original format, the only route to a PNG coming out, and only if a PNG went in. Keeping a PNG re-encodes it losslessly, so quality settings have nothing to bite on. A single file downloads as compressed.webp, or whatever extension you finished in.
The two boxes that beat any quality setting
Max width (px) and Max height (px) sit next to the format picker, both showing the grey word original as a placeholder. A 4,000-pixel-wide photo displayed 800 pixels wide on a page carries five times the pixels anyone will ever see, and typing 1200 into Max width does more for the file size than dropping quality ever will.
An empty box constrains nothing, so filling in only the width lets the height follow in proportion. Neither box enlarges anything either, so a number bigger than the photo you fed in is the same as leaving it blank.
Batches
Select a stack of images and you get a row per file with its own size and its own download link, a progress bar, and a Cancel button that stops the run without losing the rows that already finished. When two or more are done, Download all (.zip) appears and hands you compressed-images.zip. The before-and-after slider is a single-image feature. One file that fails prints its reason on its own row and the rest keep going.
Where the compressing happens
The encoders are WebAssembly builds of MozJPEG plus the WebP and AVIF ones, and they run inside the page, so you can pull your wifi after it loads and still put a folder of pictures through it. That’s the part I care about when the “photo” is a scan of a passport. Squoosh works the same way and is excellent. TinyPNG is popular, does a good job, and sends your file to a server to do it.
A file that’s heavy because of its format rather than its resolution is often better off converted than compressed. If what you’re shrinking is a PDF, I wrote a separate guide for getting one under 1 MB. And before a photo goes anywhere public, thirty seconds in the EXIF viewer will tell you what location it’s still carrying.